Ford Raptor Frame Rust: What to Check Before You Buy
Raptors that spent winters in salt-belt states can show frame corrosion well before an owner expects it, and not all of it is cosmetic. Here's exactly where to inspect, how to tell surface rust from structural damage, and what it actually costs to fix or walk away from.
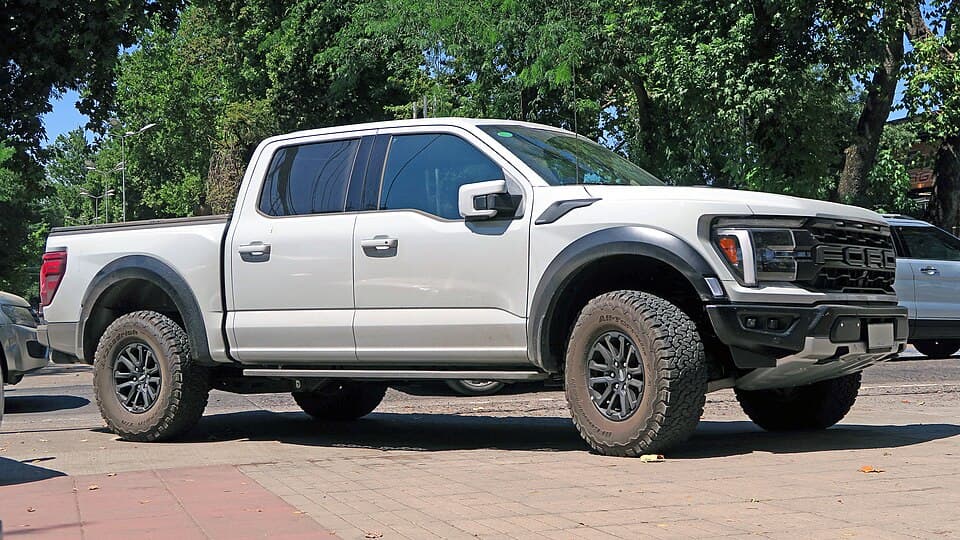
Frame rust on a Raptor is almost never about the Raptor. It is about where the truck spent its winters and how old it is. A 2017 Gen 1 that lived in Arizona its whole life usually has lighter surface corrosion than a Gen 2 that spent its winters in Ohio or upstate New York. Check the frame yourself, on a lift, before you hand over a deposit, because a seller photo from ground level tells you nothing.
There is no widely documented NHTSA recall or Ford TSB (technical service bulletin, a published repair procedure, not a recall and not free work by default) naming the F-150 Raptor specifically for frame corrosion. Ford's documented frame rust concerns over the years have mostly centered on other F-150 model years and the Super Duty lineup in heavy salt states, not the Raptor as its own failure mode. Verify current NHTSA and Ford records with your own VIN before you assume anything is covered. Treat this as what it actually is: a used body-on-frame truck problem that applies to any F-150-based vehicle that is old enough and has lived somewhere salt gets sprayed on roads all winter.
Why this matters more on some Raptors than others
Every generation sits on a steel frame that, like most half-ton trucks, mixes fully boxed sections (typically under the cab and toward the front) with open C-channel sections further back. The exact layout has changed some across model years, so do not assume a section is boxed just because the one ahead of it is. What stays constant is the chemistry: steel plus road salt plus time equals rust, and the variable that actually matters is exposure, not a Raptor-specific design flaw. A Gen 1 Raptor (2010-2014) or Gen 2 Raptor (2017-2020) that spent winters in Michigan, Ohio, Pennsylvania, upstate New York, or anywhere else that salts roads has had far more chances to trap brine in the frame's seams than a same-age truck from Texas, Arizona, or California.
This is why the smart move, if you have the flexibility, is to shop a Southwest or Southern-market truck first and treat a Midwest or Northeast truck as needing a harder inspection, not an automatic pass. Dealers often bring in "clean Southern trucks" specifically because buyers know to ask the region question. Confirm it with a vehicle history report showing registration states, not just the seller's word.
What to physically check, and why a lift matters
A flashlight and a crawl underneath in a driveway will miss early-stage scaling hidden behind skid plates, brush guards, and sound deadening. Get the truck on a lift at a shop, or at minimum on ramps with real ground clearance, and go through this in order:
- Frame rails near the rear leaf spring hangers, especially on Gen 1 trucks. This is the classic trap spot: road spray gets flung straight up off the rear tires and pools where the hanger brackets bolt to the rail, and the pocket rarely drains.
- Control arm mounts, front and rear. Look at the boxed sections where the upper and lower control arms bolt in. These carry suspension load, so flaking here is worth more scrutiny than flaking on a flat rail face.
- Skid plate bolt areas. Factory and aftermarket skid plates trap moisture against the frame rather than keeping it off. Pull a bolt or two if the seller allows it and look at bare metal, not just the visible edge.
- Brake and fuel line routing along the frame rail. These lines are steel or nylon-jacketed steel and run close to the rail in brackets that hold moisture. A line that looks heavily pitted or has a bracket rusted solid is a real safety item, not cosmetic.
- Cab mounts, where the body bolts to the frame. Rust here can loosen the mount over time and it is expensive to address because the cab has to be supported or lifted to get at it properly.
Bring a flathead screwdriver or an ice pick. Scrape, do not just look. Surface rust flakes off under light pressure and leaves solid metal underneath. Anything that resists the scrape but crumbles or produces thick flakes is scaling, not surface oxidation.
Surface rust versus scaling versus perforation
These are three different findings and they call for three different decisions.
Surface oxidation is a dull orange-brown coating on bare or chipped paint. It scrapes off easily, the metal underneath is solid, and a wire wheel plus a rust-converter product and fresh undercoating handles it for well under $200 in materials if you do it yourself. This is normal on any frame over five or six years old and is not a reason to walk away.
Scaling or flaking rust is thicker, often orange-brown with a rough, pebbled texture, and it comes off in chunks or sheets rather than fine dust. This means the metal has actually lost thickness, not just surface finish. This is the category that needs a real decision: how far has it progressed, and is it isolated to one area or spread across the frame. A shop with a wire wheel and a caliper can tell you remaining wall thickness in the worst spots. This is not a walk-away by itself, but it is a negotiating point and a job that needs tracking.
Perforation means you can see through the frame rail, or a punch goes straight through metal that should be solid. Any perforation on a load-bearing section, a control arm mount, a leaf spring hanger, or a cab mount, is a walk-away on that specific truck unless the seller is willing to come down enough to cover a serious repair and you are willing to manage that repair yourself. Do not buy a truck with perforated frame sections assuming you will "get to it."
What remediation actually looks like, and what it costs
| Severity | What it involves | Rough cost range |
|---|---|---|
| Surface oxidation | Wire wheel, rust converter, rattle-can or spray undercoating | $50-200 DIY; shop detailing/undercoating service typically $150-400, estimate |
| Scaling, isolated | Grind to clean metal, weld in a patch or reinforcement plate on the affected section | Budget $500-2,000 per section, heavily dependent on access and whether suspension has to come off, estimate only |
| Scaling, widespread | Partial frame section replacement (cutting out and welding in a new rail segment) | Budget $2,000-6,000, and that is a wide estimate because labor hours vary enormously by shop |
| Perforation across multiple structural points | Full frame swap, pulling the body and running gear onto a new or donor frame | Budget well into five figures; many shops will simply tell you the truck is not worth it |
These numbers are rough estimates only, not quotes, and they swing hard based on your region's labor rates, whether the shop has to pull a bed or cab, and whether they can source a direct-fit frame section versus fabricating one. Call two or three frame shops in your area with photos before you commit to a number in your head.
Weigh that estimate against what the truck is actually worth before you decide it is worth fighting for. Raptor trim carries a real premium over a comparable regular-cab or SuperCrew F-150, so do not anchor your repair math to generic F-150 pricing. Check what clean examples of your specific year and generation are actually trading for, and if a seller's asking price does not leave room to absorb a multi-thousand-dollar frame repair, that is your answer regardless of how the rest of the truck looks.
A rust converter and a can of undercoating is a real fix for surface oxidation and a reasonable maintenance habit for any truck that will see more winters. It is not a fix for scaling, and it is definitely not a fix for perforation. Do not let a seller or a quick-detail shop talk you into believing a sprayed-on product addresses lost metal.
Where this fits in a full pre-purchase inspection
Frame condition is one line item on a longer list. If you have not already gone through the full process, start with the Ford Raptor pre-purchase inspection checklist for the complete walkthrough, including engine, transmission, and suspension checks that matter just as much as the frame. If you are specifically narrowing in on a Gen 1, the Gen 1 buying guide covers the 5.4 and 6.2 engine questions that come with that generation. Shopping a Gen 2 instead, the Gen 2 buying guide covers the cam phaser and 10R80 transmission questions you will also want answered before you sign anything.
The short version
- Raptor frame rust tracks the truck's age and the salt exposure of where it lived, not a Raptor-specific defect, and there is no confirmed recall or TSB for it as of this writing. Verify your own VIN against current NHTSA and Ford records before you assume anything.
- Inspect on a lift: rear leaf spring hangers (Gen 1 especially), control arm mounts, skid plate bolt areas, brake and fuel lines, and cab mounts. Scrape, do not just look.
- Surface oxidation is fine and cheap to treat. Scaling that flakes off in sheets needs a real repair quote. Perforation on a structural section is a walk-away unless the price reflects it.
- A Southwest or Southern truck is the safer default if you have a choice. A Midwest or Northeast truck can still be a good buy, it just needs a harder look and a frame shop quote, compared honestly against what that specific truck is worth, before you commit.
Deal alert
Shopping for one? Get new listings first
We sweep US dealer inventory and send you new Raptors matching your search — real listings, real asking prices, no spam.